Ever since I created this photo, I've had people asking me how I went about making it. I finally decided to make a step-by-step demonstration of how it was done.
Enjoy.
-------------------------------------------------------------------------------
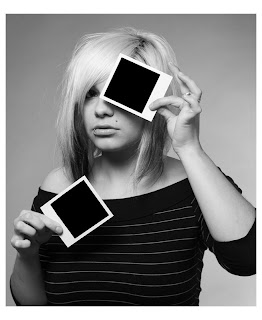
1. The photo shoot itself was pretty easy. It was just two photos.
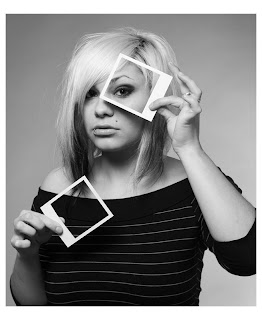
I had the model hold two blank Polaroid photos in front of her face for the first shot. Then I had her gently open her fingers to drop the Polaroids, but not to change her hand position.
The purpose for that was so I could see what was behind the Polaroids and put it back in later.
-------------------------------------------------------------------------------
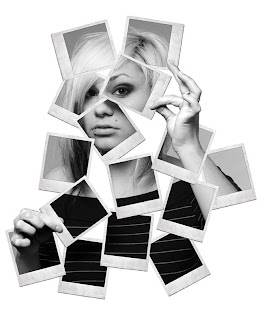
2. Everything from here on out was done using Photoshop. I merged the two photos together to create this shot. This was my safe point.
I liked this shot as is, so just in case the concept didn’t translate from my head to the final image... at least I had this fun shot to fall back on.
Fortunately for me, it did work.
-------------------------------------------------------------------------------
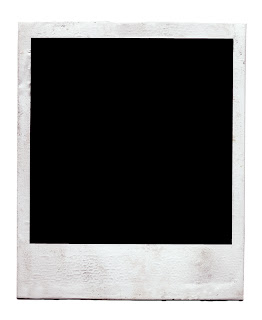
3. The Polaroids I used were too clean for me. So I took a picture of another Polaroid that I had, which is obviously a little dirty.
This is what I would use as the basis for all the scattered
Polaroids.
-------------------------------------------------------------------------------
4. I took the dirty Polaroid image and duplicated it until I had 15
versions. Then I scattered them around until I felt they looked random enough.
Obviously I had to make sure that two of them lined up with the two that the model was holding.

-------------------------------------------------------------------------------
5. Finally it was time to start to merge the images together. I brought in the original image, and masked out everything that wasn’t in a Polaroid photo. Then I made another layer of just the hands so they appear to be reaching out of the Polaroids.
The concept was definitely coming together now.
-------------------------------------------------------------------------------
6. I really liked the way it was looking, but knew I had to get it to pop out more. So I created drop shadows for all of the layers.
The Polaroids that were supposed to be laying flat had shadows that were very close to them. But the two images that are supposed to look raised off of the surface got shadows that were further away from the Polaroid. That made the appear to be higher than the others.
-------------------------------------------------------------------------------
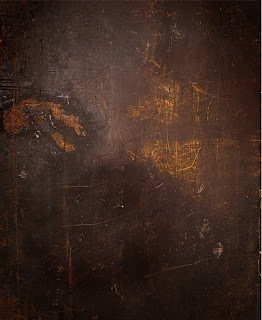
7. After looking at the image for awhile, I decided that I didn’t like it against white. So I went down to the basement of my house and took a photo of a work bench surface down there.
I really liked the color of it, and how it was all beat up with lots of texture to compliment to smoothness of the Polaroids. I also liked how it made the black and white photos pop out against the color background.
-------------------------------------------------------------------------------
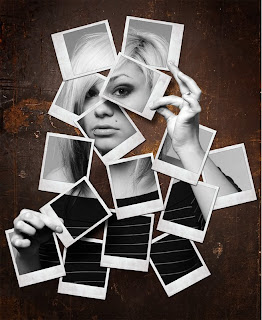
8. I placed the collage of Polaroids over the workbench image. I really liked the way it was looking, but felt that the photos almost popped out too much.
It just didn’t appear believable that they were actually on the workbench. So I decided to add some shadowing around the edges, and add a little more dirt so they didn’t look so clean.
-------------------------------------------------------------------------------
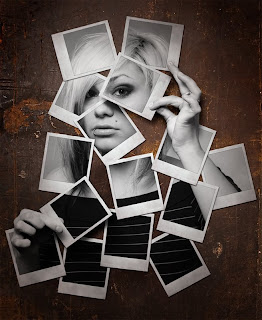
9. And that become the final result.
The entire process took about 4 hours in Photoshop. Normally something this intense would take longer, but this project just clicked together without a lot of problems.
Please feel free to email with any questions you may have.
~ photo@jeffzoet.com
Thanks. I hoped you enjoyed seeing this process.


